Blog Design

_________________________________________________________
Showing posts with label Audrey 2. Show all posts

Monday, September 16, 2013

More Mealybug Drama!

So the little buggers are still around.  I have been meticulously spraying the plants with the Bayer Advanced Natria Insect, Disease & Mite Control. It gets rid of the bugs on contact and for a good 5 days afterwards, but they would surely find their way back.  I realized they must be hiding in the media itself.  I ordered online some Bayer 3-in-1 Insect Disease and Mite Control Concentrate.  This is a systemic poison with the main active ingredient being Imidacloprid (sold under the brand name of Merit), which has a very high success rate.  This insecticide is successful not only because of its chemical composition, but also due to the form in which it is administered.  It is fed to the plant during watering and in a few weeks, it makes the plant itself toxic so when the pests feed on the plant, they ingest the poison and die.  If this is what it takes to keep my orchids mealybug free, then so be it!

In the meantime, I took out each plant out of its pot and got rid of all of the media in the pots.  I  then carefully washed all the roots and sprayed each plant and roots with Bayer Advanced Natria Insect, Disease & Mite Control while out of the pot and left it to soak a good 10-15 minutes.  I then washed the pots thoroughly and let them sit in diluted bleach while the plants were being treated with the insecticide.  Once I was ready to repot, I prepared fresh new media, sprayed the insides of each ceramic and plastic pot with insecticide just in case any bugs were missed the first time and carefully repotted each orchid.  I also took the opportunity to sterilize the humidity trays and wipe the wooden coffee table well, even under its lip.  I didn't want to take any more chances with these resourceful and very tenacious little pests.

As I was treating the plants, I noticed Marilyn has grown a new root and leaf.  Audrey 2's roots are in much better shape and I also gave her a slight trim of a few dead roots.  Rocky is still hanging in there and appears to be doing much better.  The problem with Rocky is that he has so many nooks and crannies for the bugs to hide so he got an extra dose and time of pesticide goodness.  Vino had some great new growth, but lost 2 other leaves to the mealybugs .  I took extra time with him to ensure I got all the bugs.  Kalista was the worse off.  The bugs had established themselves in her delicate leaves and had infiltrated the media as well.  It was not pretty at all!

And lastly, Snow White's roots, unfortunately, had not only succumbed to the bugs, but also had dozens of black spots all over her roots.  Some type of fungus had attacked the weakened Phalaenopsis.  Since I didn't want the unidentified fungus to spread to my other plants, I painfully decided to toss it before it was too late.

I would say that the mealybugs won the last 2 rounds, but I came back with a killer upper cut and stunned them this time.  Let's see what happens in the next round?

Saturday, August 31, 2013

More on Seramis Orchid Mix

So after trying the regular Seramis clay granules for houseplants for over a week and having good results; the media held the water longer, but remained aerated and the look and texture of the roots was improving, I decided to order my very own bag.  I ordered from www.seramis.com.  I found out that the distributor here in the US is located in Germantown, MD.  Additionally, I wanted to try the actual mix that was specific for orchids.

It turns out that Seramis in the US is now a subsidiary of Mars, the candy and pet food company.  Once I received my shiny yellow bag of media, I repotted both my Phals.  I left the mix dry until tomorrow morning when the orchids get their monthly dose of liquid kelp.  This batch of Seramis is mixed with some type of bark.  I am looking forward to continued good results and hopefully, having my Phals grow some new healthy roots.

___________________________________________

Update

Since I repotted both my Phals into the Seramis Orchid mix, I have noticed that Snow White's roots have plumped up significantly.  She's been in it, for about 2 weeks or so.  At first, I potted her roots very shallow and they were exposed to air for about a good week or so.  After that initial week, I buried most of her roots a bit deeper, but left the media nice and airy.  I made no effort to pack in the Seramis, but only to cover the roots.  I have been watering her every 3-4 days and in between, I have been spraying her leaves with a weak mixture of water and Superthrive.  Her roots are now nice and green and very plump.

Her roots had black rotted spots scattered through their surface and were stained
brown from repeated fertilizer application


Her air roots as well as the ones in the media are a nice healthy shade

Of course, as the roots improve, the plant also takes a turn for the better in regards to its physical appearance:


Her oldest leaf yellowed and died.  Since I purchased her with 3 flowering spikes, I decided to sacrifice the last of the flowers, which were about to die in a few weeks anyways.  I trimmed the triad of spikes down to the base to ensure the plant would concentrate on repairing itself rather than producing or maintaining old blooms.  Since then, she has also put out a new leaf in the center, which is growing at a good pace.


Audrey 2, on the other hand, is not doing so well at the moment.  I am watering her a lot more conservatively until she recovers a bit more.  I transferred her over to a clear homemade pot and made numerous ventilation holes throughout its surface.  With the new mix, her roots should recover nicely and she is already working on putting out a new leaf:

These roots are still off colored and still rather stringy


New leaf growing

So far, I would have to admit that the Seramis Orchid mix has been a positive addition to my culture!

Monday, August 5, 2013

Audrey Comes Home!

I really tried to do the best I could with Audrey at work.  At first, it was ok, but lately, her roots have been looking a bit worse for wear.  She went through most of her blooming cycle and has retained a few of her dainty flowers.  But as far as her roots, I suspect they are sunburned.  Currently, I still time share a window at work, and since the executive that occupied that office was out on leave,it worked out perfectly.  However, since the person retired recently and now the office is slated for another occupant, they may not be as flexible...and then what?

Since I purchased the new humidity trays and have revamped my setup at home, I have discovered I actually have a limited amount of additional space.  This being the case, I decided to just bring Audrey home.  In my apartment, I will be able to give her more dedicated care and repot her into something smaller. 


I think the 2 main reasons she is skating by is that the window exposure may be too much during the weekends when I am not in the office, and since she is potted in a larger pot, the soil remains wet at the bottom and dries up where the sun hits it.  By the time, I come in on Monday, the top most soil, and where the roots are exposed to air, are totally bone dry while the soil in the bottom 3" - 4" of the pot are still quite wet.  In order to avoid rotting the roots, I usually wait to water her, but she is probably really thirsty by then, and since there is no breeze, it takes the medium a lot longer to dry out at the bottom.

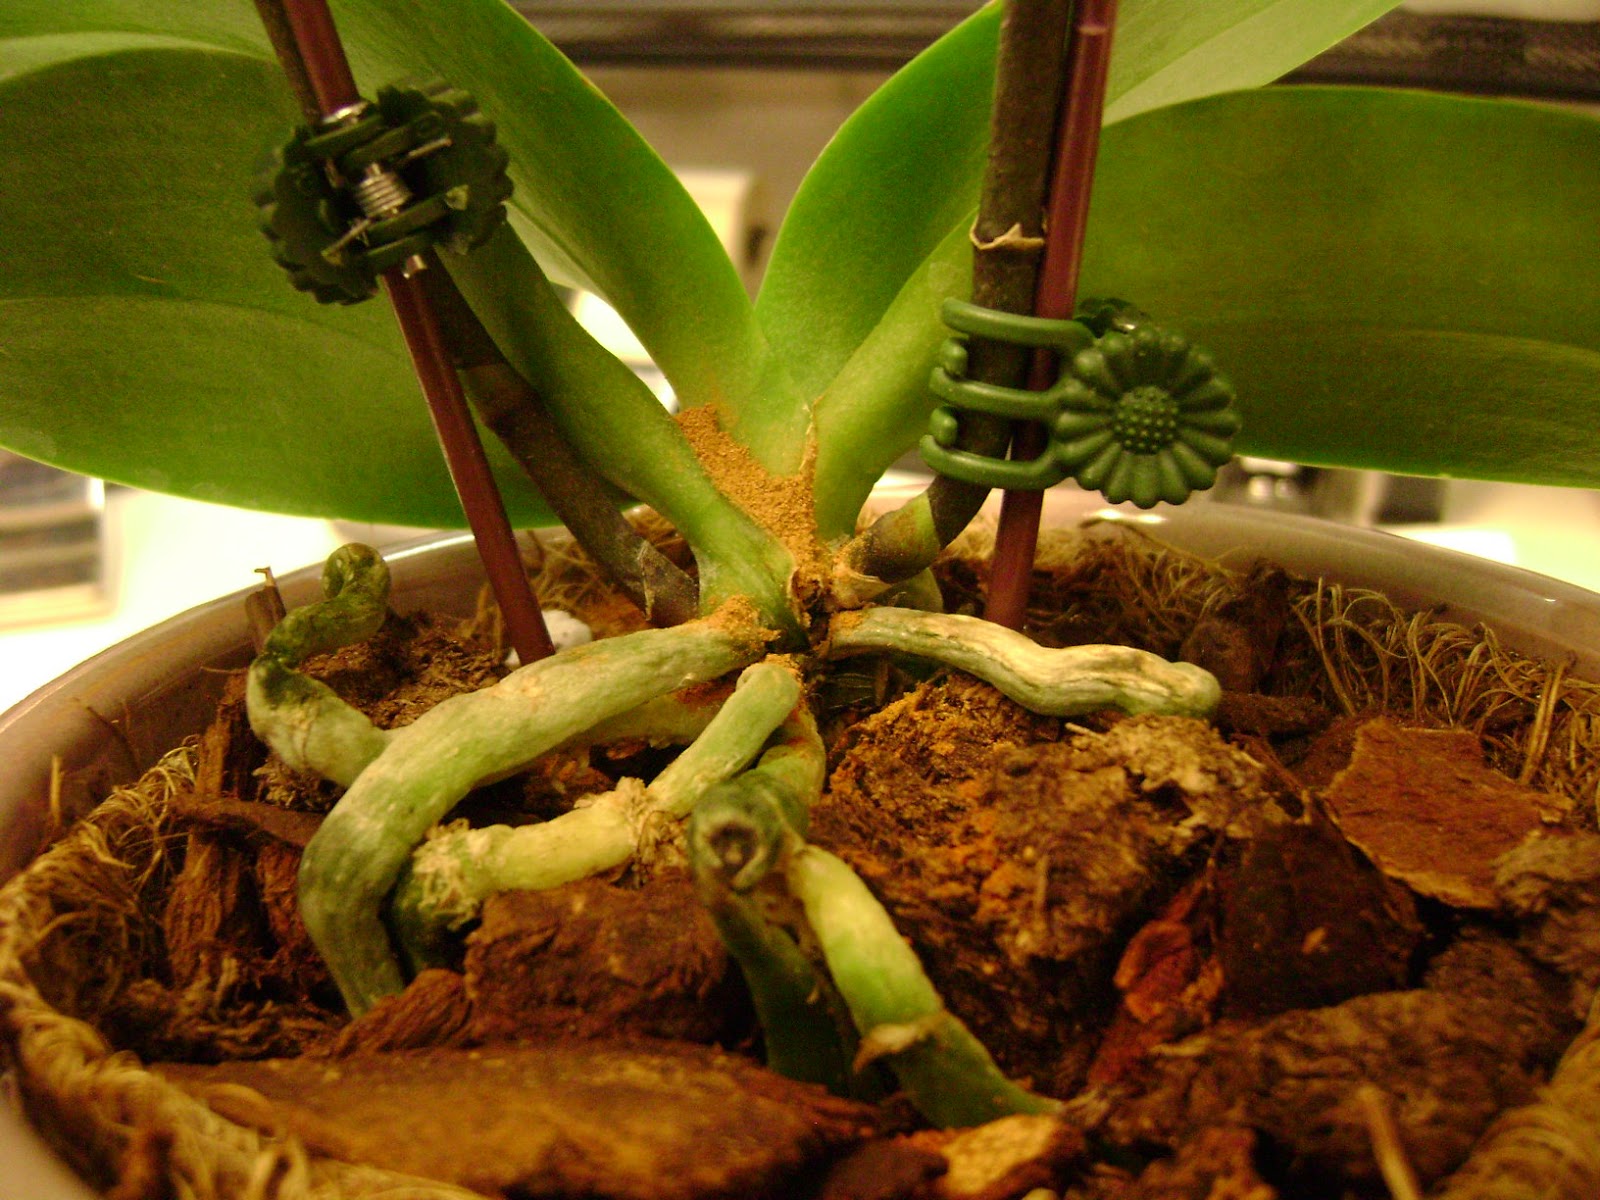
Audrey's sunburned roots

In the office, I don't have a dedicated fan for her so she really does not get too much air circulation.  All this can be controlled much easier at home.  To be able to do this in the office, I would have to make a substantial investment in a quality fan and grow lights since I won't have access to a window any longer.  Besides, I am not even certain how well a grow light, despite choosing one that would blend in with the decor, and would be rather inconspicuous, would be received by my coworkers.  Not to mention, I would have to reorganize my workspace entirely to make this work.

So taking all this into consideration, and the fact that Snow White is doing so well at home demonstrating I might have finally gotten the Phal basic care down pat, I think it is the most prudent choice.
________________________________________________

Update

That evening when I got home, I repotted Audrey into a 4" nursery square pot.  Her roots were actually in pretty good shape.  The ends were not rotted just the roots near the base of the crown were scorched by the sun.


I am certain she will be much happier in this much smaller pot.  And since I can't resist...one more closeup look at those pretty little flowers!


Monday, June 24, 2013

Righting a Wrong

On Friday, I knew I needed to water Audrey before I left for the weekend.  I also wanted to attempt to rectify the whole not soaking the bark mix in her pot rookie mistake I had made.  I brought in my little pre-mixed bottle of fertilizer with me.  I knew I would soak her pot in another larger pot with some water for a good 1/2 hour or so.  I wanted the media to absorb as much water as possible before I allowed it to drain.  My conundrum was do I add the fertilizer before I soak her and have it washed away? or do I water her again after allowing her to soak so that the final water rinsed contains the fertilizer?

I decided that since the fertilizer can be diluted a great deal, I would water her with the fertilizer and allow the excess to collect at the bottom of the pot.  I then added about a liter of water and incresed the water level to about an inch short of the lip of the planter.


I know this sounds like it goes against the #1 cardinal rule of orchid growing "do not overwater!", but I also know of several people that water this way consistently quite successfully.  I also used this method when I used to keep Bonsai's.  So after her tub bath, I drained Audrey well, and placed paper towels at the base of her overflow dish, which is attached to the pot, to soak up any excess moisture.  I also let her hang out with me in front of the fan for a while.

Funny thing is I didn't realize how much she would enjoy this.  I have never seen her roots as plump as they are right now:


I was worried of the whole soaking thing having the opposite effect.  I never imagined, she would appreciate being left in the water for a nice long soak.  My intuition was right and the dry bark mix was not allowing her to get the amount of water she needed.  It will be interesting to see how long it will be between waterings now.  I was also worrying about my upcoming vacation when a coworker will be watering her while I am gone.  I will only be gone for a week, but I am terrified of her getting water in the crown, particularly after what happened last time.  I am hoping I can get away with oversaturating her again the Friday before I leave and then giving her that entire week to dry out.  We'll see!

Cut Off the Top of the Dead Flower Spike

This morning, that flower spike, which had been drying out did not continue dying off passed the next branch full of blooms.  I decided to bite the bullet and cut off the dead tissue at an angle right above the branch of pretty little flowers.


Other than that, the plant itself is doing great.  Today, she got another soaking after the weekend.  I find this soaking method really works for her in this environment and media.  I am just sorry I did not think of it sooner.


After I cut the spike, I dabbed some powdered cinnamon at the removal site since the tissue underneath was very much alive and I don't want to run the risk of any nasty bacteria to enter by way of that open wound.

Friday, June 21, 2013

Orchid Knows Best - Passively Watching the Death of a Flower Stalk

As is the natural course of these things, one of Audrey's flower stalks is starting to dry out.  I was hoping I would not lose the flowers which are currently on it, but I think the choice is not really mine.  We humans are so silly sometimes! Obviously, Audrey has decided to saver her energy before the next bloom cycle begins.  I see now she is a rather opinionated little orchid, and has left me no say whatsoever:

The flower stalk in the middle of the picture is turning pink and drying out

Most often than not, it is best to sit back and let mother nature take its course.

Here is a better angle of the boundary line to where the dessicating is extending
 

Wednesday, June 19, 2013

Status on Audrey

I really do feel bad that Audrey turned out to be my learning plant.  On one hand, I appreciate the many lessons she's taught me, and how I have been forced to reeducate myself on Orchid care.  But, on the other hand, I feel awful about all the stupid mistakes I have made along the way.  I believe by next year, if I can get her to bloom for me, the delicate little flowers will last much longer. 

Yesterday, a receiving my supplies I had ordered online, I repotted Petaluma at home in her new pot.  However, I still need to get a bottle that will allow me to mix the MSU Feed Me! liquid fertilizer I will be using.  I will need to ration the diluted solution between the 2 plants and bring some in with me from home in a much smaller container.

I also began working on my own customized version of and Orchid Calendar so I can keep track of when to feed stronger dosages, and when to reduce feeding or provide less moisture, etc.  This way, I can also track the last time the plants bloomed, were repotted, when I need to start using the humifier, and in the winter, eventually, the grow lights.  It's still a work in progress, but here it is:


This morning, additional blooms have fallen off, but she still has a few left.  Once she's done with her flowers, I will cut both spikes down to the base.  This seems like a scary proposition for an inexperienced grower, like me, but I am going to try it out since this is what is best for the plant overall.

The number of flowers is dwindling, but there are still a few good ones left

Roots are nice and plump, green, and very healthy

Foliage has a nice color to it although a little on the dry side for my taste

I really do have to work on hydrating that bark mix more.  Because it was never soaked prior to being used, it does not retain the moisture as long as it should.  I can definitely see the difference now that I can compare with how Petaluma is doing at home.  For now, I will keep watering as often as possible without overwatering.  I am just thankful she has taken this all in stride and is doing quite nicely!

Friday, June 14, 2013

A Happy Orchid is a Pretty Orchid!

This morning, I carefully inspected the site where that yellow leaf had fallen off.  Since the leaf fell off naturally, I wasn't as concerned as if I had to remove it using some type of sharp cutting tool.  It looked healed and it's drying out nicely:


Still being such a beginner, I know I am a very insecure Orchid caretaker.  However, upon further inspection, she looks to be in good shape. 


Recently, I made a few slight modifications regarding my still evolving Orchid care routine:

1)  I am giving her more fan time in the morning to get some good air circulation between the blooms, leaves, and those roots.

2)  I added a bit more of the bark media over the exposed roots at the base of the plant.  I was concerned that when she's sunning, her roots are vulnerable to sunburn during the weekends.

3)  I started watering her with a small plastic cup to eliminate the possibility of getting water in the crown or lodged between the small crevices near the basal leaves.

4)  I am a lot more selective of when to water.  I am now sampling a few areas within the center of the pot and outer rim seeking moisture or cool media prior to opting to water.  I have adopted the mantra I learned from the orchid board:  "If in doubt, wait a day" . Orchids are able to tolerate underwatering a lot better than rotted roots due to overwatering.

So after these small tweaks, I can now profess that she's adapted nicely to the office environment and the care I have been giving her.  She's taught me a lot over the past few weeks.

Thursday, June 13, 2013

Yellow Leaf Fell Off Today

This morning, I felt through the bark media with my finger.  Since I was able to detect some moisture by feeling within the center of the pot, I decided to not water her today, but instead, to treat her to a few hours of breeze with my trusty desk fan.  I took the time to inspect the withering blooms and some fell right off as well as a few buds, which never fully developed and ended up shriveling up anyways.  As I was turning the pot, the yellow leaf fell right off, but a good 1/4 of an inch of the old leaf remained at the base of the plant.  I powdered the area with some cinnamon just in case, but she looks really good.  I think I may get the hang of growing Audrey just yet...yay!!!

Tuesday, June 11, 2013

Audrey Seems to be Stabilizing

This morning, as I watered Audrey, I tried to be extra careful to not get any water in the crown, but being she's so small and her crown is so close to the media, I did get some near the bottom leaf that is already yellowing.  I will need to not water her inside of the sink and maybe use a cup to dispense the water so I can do it more slowly and carefully.

Other than that, no more yellowing.  The original yellow leaf, of course, will be lost. 


However, I did notice that it seems she's growing a little root near the site where the rot was excised.  I will be honest, to me, the root doesn't appear to the the healthiest, but it is also completely outside of the media and looks dry.  Eventually, it will be long enough to grow into the bark, but right now, it is pointing down on it's way there.  I don't dare to mist the new root since I am afraid to get water anywhere near the crown.

I apologize for the blurriest picture ever, but I tried 3 times and this was the best one
I will keep an eye on it, but I suppose the fact that she's growing a new root is a good sign.

Monday, June 10, 2013

Audrey's First Yellow Leaf

This morning, I discovered a yellow leaf.  I will admit, at first, I was quite freaked out.  The first thought that came to mind was 'Oh my gosh, I have overwatered her and I am killing her!" However, upon closer inspection, I realized none of the other leaves were turning yellow and there were no signs of rot, either.  The roots were still green so I decided not to water her today.  I also let her hang out with me for a bit at my desk and directly across from my Zippi fan to get some much needed air circulation.


So it looks like it's just simple aging of that particular leaf.  I am VERY relieved, but I will continue to keep on eye on her.


Other than the discolored leaf, she is looking pretty good.  Her blooms are continuing to die down so I am assuming she will soon go into a rest period before the Summer to recoup her energy for her growth stage during the Fall.  I was reading at Repotme.com about the 2 schools of thought regarding dealing with the yellowing leaves; I feel that I am most comfortable with letting the orchid do it's own thing.  She can drop it when she feels she needs to, and that way, there will be no open wound to worry about. 

Friday, June 7, 2013

Audrey's Recuperating Quite Nicely!

This morning, I watered her again.  The bark is still fairly new so it is still not retaining the moisture for very long.  After her watering, I inspected her wound:


The cinnamon is still impacted in there, but the best part is no other discoloration in the area and the rot has not kept spreading to the other side of the leaf:


The other great thing is that her leaves are still a good color and nice and perky, no droop whatsoever.


I did notice that the initial set of flowers is now starting to die out.  They are the oldest blooms and closest to the leaves.


There are a couple of buds which still have not opened and it looks like she is still growing her flowering branches. I have read that sometimes when an orchid has had some type of trauma as was the minor surgery recently, that the plant will blast the buds in order to heal itself. I am still a newbie so I can't make that determination on my own just yet, so I will just have to wait and see.  I have also read in several places that growing an orchid is certainly an exercise in patience.  I am starting to see how true that is!

Thursday, June 6, 2013

New Growth

Other than the hopefully minor bout of crown rot, Audrey appears to be doing very well.  I spotted several mittens in a couple of locations along her flowering spike.  And for those of you, like me, who are new to orchid anatomy, here's a little helpful diagram:

 
So, let there be flowers:


Minor Surgery for Audrey Today

This morning I brought in some first aid grade peroxide and powdered cinnamon from home as per the advice of the gurus from the orchid board.  I was able to disinfect my office shears and cut away a part of the leaf that had the black rot, but between the leaves, there was a pocket of it going through the leaf.  I dug out as much as I could so there was a hole in the underside of the leaf, but it had not gone all the way through:

It looks much worse in the picture, but all the black rot was scraped out of the hole

Once all the stuff was out of that crevice, I applied the peroxide to both the spot I had cut the leaf and the hollow hole you see above.  I then sat Audrey right in front of a small fan for a good 10 minutes to ensure everything in there was nice and dry.  Once I was certain that she had dried thoroughly I packed in the cinnamon to both wounds.


Here she is recovering post-op:


After surgery, she earned a nice watering and some much needed window time.  This time, I was very careful not to get any of her foliage wet and checked to see if the bottom of the pot was completely drained several times.  I don't want to take any more chances.

Hopefully, Audrey will make a full recovery and the rot will stop in its tracks.  It's just in a really bad spot if it were to spread.  From what I have read, she should be fine as long as I continue to keep the area dry and I definitely will be doing that!

Wednesday, June 5, 2013

Eeeek!!! Something is Horribly Wrong!

Today, I was inspecting my little princess and I discovered a black spot between 1 of the leaves.  I immediately separated the leaves and saw it wasn't as localized as I originally thought:


I am hoping it's not too serious since she's still in full bloom.  More of her buds are opening and the rest of her leaves are a good color and quite perky.  I put a post on the orchid board to see what the gurus have to say.  I am really hoping for the best!

I took several pictures of her today to document her flowering:


Repotting a Blooming Orchid

So I found myself an orchid board and joined to ask all the stupid questions and learn as much as I possibly could before Audrey began to wilt and die.  Yes, I was totally having flashbacks of the past.  They taught me that new orchids are generally purchased in small clear pots packed tightly into Sphagnum moss.  For some the Sphagnum moss is a blessing because it is amazing at retaining water for a long time, for others, it is a curse.  It all depends on how heavy you are with the watering can, and in what environment you will grow the plant; whether it's dry, humid, cold, hot, etc.  The one thing they stressed was not to try to repot as long as the plant was blooming because I would expedite what is coined as bud blast.

I was schooled in different types of medium to plant in, different types of pots, fertilizers, etc.  It all seemed a bit overwhelming, at first, but then I figured some of it out.  As with any other board, there were members who agreed on one philosphy, for example repotting while in bloom, and there were others, who completely disagreed.

At first, I did remove Audrey from her original pot entirely to examine the roots.  They were in almost perfect condition; no root rot whatsoever, but where the sphagnum was packed the tightest, the root had begun to turn brown so it was a good thing that I decided to loosen some of the moss to circulate more air in between the roots.  I learned that in the wild, Phalaenopsis (Phal) orchids grow on trees and  get their water from rain or the moisture in the air.  They live in humid climates, but in captivity, it is more convenient for us to keep them in pots so the medium in the pot needs to be mostly humid, but allow for good air circulation so that the roots are never kept soggy resulting in root rot.  I also learned that orchids do not like big pots and that larger pots also more rot friendly since more medium needs to be added to fill them and then the moisture is trapped in the middle for a longer span of time.

I searched high and low for a good pot for Audrey.  I swore up and down that I would not repot until she finished blooming, and at the time, I really meant it.  I wanted a net pot, which is the best for air circulation, but I could not find any locally.  Since they are very cheap, they sell them in bulk online, and I did not need 50-100 pots.  I only have 1 orchid so what is a girl to do?

I went to my local Home Depot.  I must admit that the store near me doesn't have the greatest selection so pickin's were fairly slim.  I did find a glazed pot that had lots of holes for good air circulation, but was 5 1/2" in diameter.  I was in need of a pot approximately 2 3/4" in diameter.  That would leave me a lot of extra space to promote the dreaded root rot.  I purchased a glazed pot, which is also a board no-no, but since it had lots of holes, I figured it would be fine.  The issue with the glaze is that it removes the breathability of the terra cotta.  I found a good potting mix and fertilizer.  So now I had all the materials I needed, and a plant in need of a new pot, and I tried to resist temptation, but as is often the case, I caved and went ahead and repotted her.

Since I did not find my 'dream pot', I decided to take a more creative approach to my dilemma.  I read somewhere that you could use real styrofoam packing peanuts to take up space in a pot that was too large, and I lined the pot with coir fibers from one of those hanging baskets they sell.  I simply purchased the coir liner and cut into it to decrease the circumference of the pot.  I also discovered that these things are sold with plastic wedged in the middle between the fibers and on the underside so I had to do away with that.  I discovered coir fiber is wonderful for aeration and dries up quickly so it was perfect for my intended purpose.

You can see the coir fiber lining the pot and the bark mix on the inside of it

If you look really carefully, you can see the coir fiber liner through the holes in the pot


I chose a bark mix specifically made for Phal orchids.  I first placed about 2 inches of packing peanuts in the bottom part of the pot to take up all the excess depth, then lined the pot with the coir fiber, and placed Audrey in the center.  I then gently packed in the bark orchid mix around and under her.  I made sure to leave some of the roots out on top of  the medium to allow those roots to photosynthesize and breathe.  I did this on a Friday and that Monday when I returned to the office, I expected to see all of the expelled buds strewn across the window sill, but no, seems she really likes her pot with this setup.

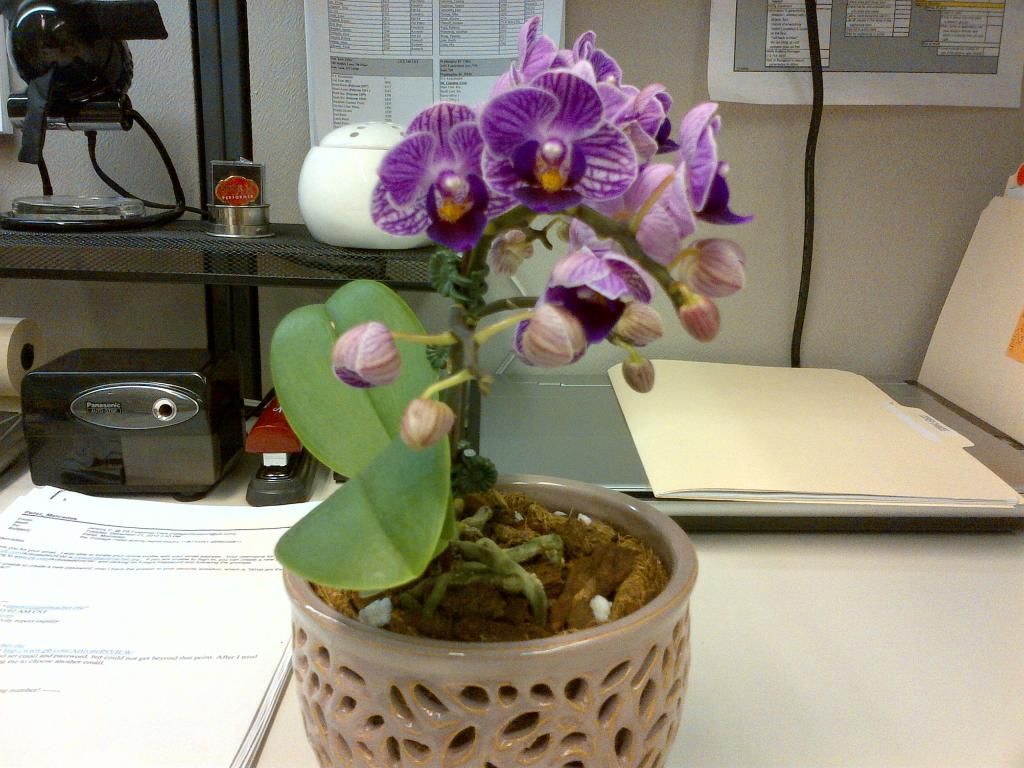
Here is Audrey after her first repotting a week after I took her in:


I managed to sneak her into an office with a South window so she can get at least 4-5 hours of sunlight per day during the week, and I can leave her on the sill all day during the weekends.  In the Winter, I may need to purchase a grow light for her.  Luckily, the person that occupies the office, I took it upon myself to timeshare the window with, travels a lot so it won't be an issue for a good long while.

Here is a good instructional video showing step by step how to repot a healthy orchid:


When you do need to trim the roots, when any are brown, black and mushy, you will need to sterilize your cutting instrument to avoid infecting the plant with any fungus or virus, which may be lurking around waiting for the right time to attack your pretty plant.  You can do this by dipping the shears or blade in Isopropyl alcohol until the cutting blade has been well saturated.  After you are finished trimming the dead roots, you should sprinkle any incisions with cinnamon powder, which acts as a disinfectant and anti-fungicide or you can also use a commercial solution.

The First Meeting

It was a beautifully humid, May 24th in 2013.  A coworker and I went to the Plant District, which in NYC means the high 20's off of 7th Avenue.  We rummaged through the many shops on 28th Street, and  after a couple of hours, of course, he found what he was looking for.  In the same shop, across from the cash register was this display of adorably cute little orchids in clear soft pots.  I just melted.  I always wanted to care for an orchid, but had not considered one due to their reputation of being 'fussy' and 'difficult'.  Also, I must confess I got a hand me down one years ago from a previous employer.  It was a beautiful white orchid plant and once the blooms fell off, she let me have the plant.  I gleefully took it home only to have it wilt and die before my eyes.  I tried everything; cutting down the rotting roots, repotting, etc. So from then on, I too, joined the many who judge all orchids as being too difficult to deal with and gave up on ever buying one.

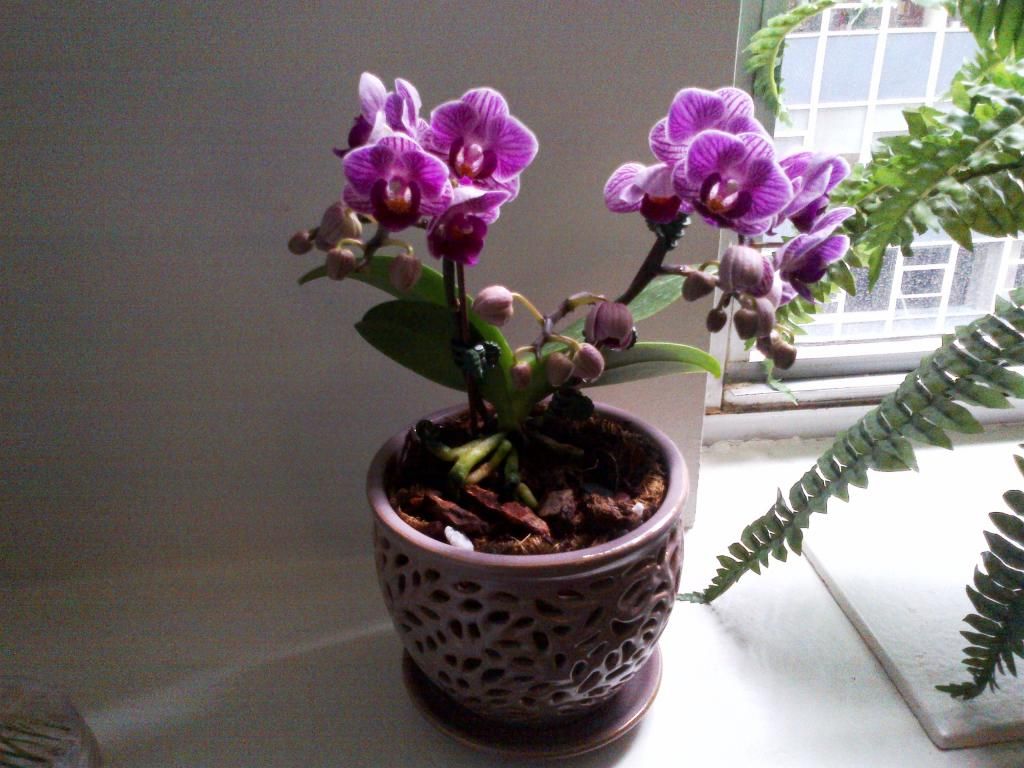
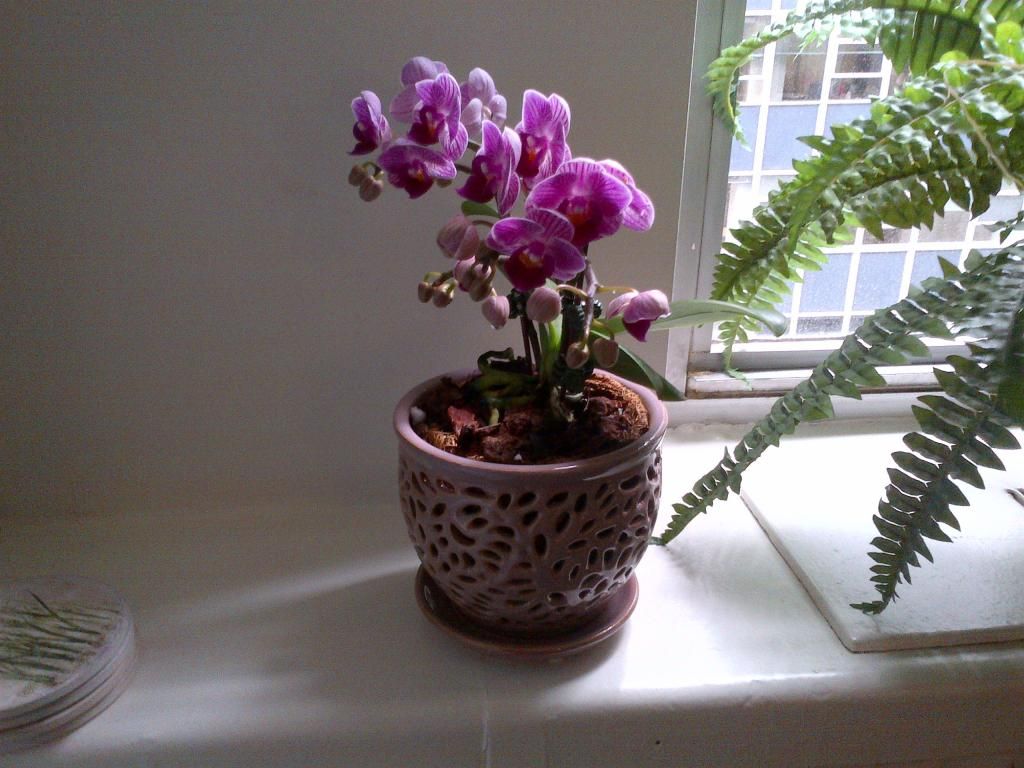
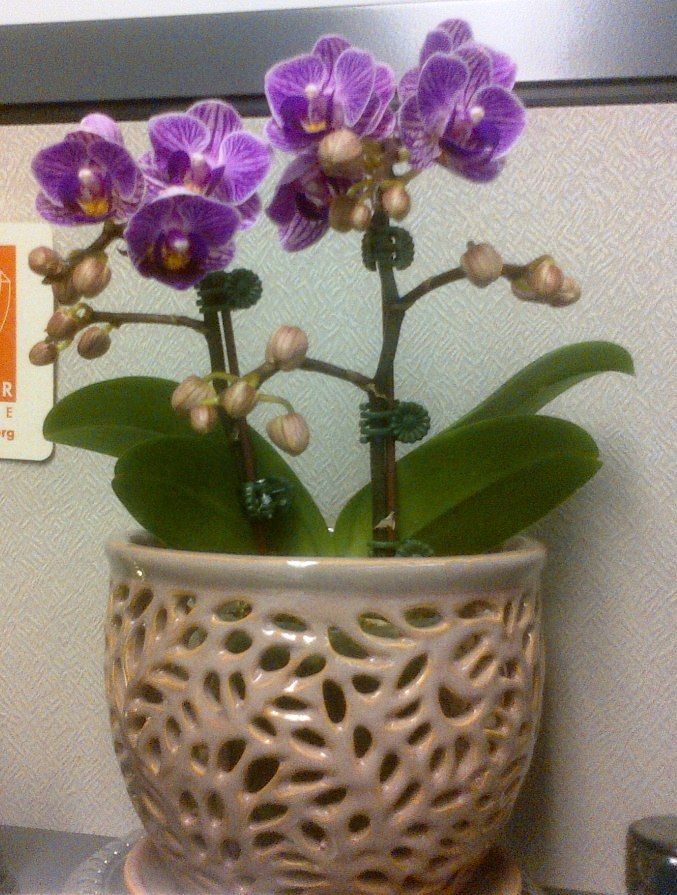
So what's changed since then? Well, for one, information is now so much more readily available than it was 20 years ago when I first attempted this, and since then, I have also grown other plants successfully so I feel more confident in my 'green thumb'.  So, I did end up buying one of the flirty magenta orchids that were displayed at the plant store.  Unknowingly, I purchased a Doritaenopsis Sogo Vivien:


First Week in the Office

which has recently been reclassified as a Phalaenopsis Sogo Vivien.  She has been very patient with me as I researched and learned how to take care of her.  I named her Audrey 2.  Yes, after the plant from the Little Shop of HorrorsThe unopened buds have a similar appearance...dontcha think?