Blog Design

_________________________________________________________

Tuesday, July 30, 2013

Breeze Mode on Dedicated Orchid Fan

I have been finding that lately the media in my orchid pots has been drying way too quickly.  I am finding myself watering my orchids every single day.  Previously, I was using my new mini tower fan on its lowest regular setting (setting 1), but found that maybe the best solution was to start using it on Breeze Mode.  Don't get me wrong; I don't mind watering the plants so regularly, but from everything I have read, the media is supposed to stay moist for at least a couple of days.  This is particularly important for Snow White, who is still adjusting to being transplanted from Sphagnum Moss to a much drier bark mix.  I'd like to see if I can reduce the need for watering to about 2-3 times per week.  I think that would be a great compromise.

From my research, in the wild, epitphytes get rained on several times per week and dry out quickly with tropical breezes.  For the most part, this cycle repeats itself week after week.  So having the media dry out pretty quickly should not be a bad thing, but not to the point that the roots become entirely dessicated regularly and the media is bone dry in a matter of a few hours.

Tomorrow I will water them as I have been doing and keep the fan on Breeze Mode for the duration of the day.  I will then test to see if the media is still drying up completely or if some moisture is retained in the lower layers of substrate for a longer period of time.

______________________________________________________

Update

I watered the orchids this morning at 9:00 am.  I left the fan on Breeze Mode, and by noon, the roots were still moist as pictured below:


Snow White's Roots 3 hrs after watering


I realized the media was a bit too loosely packed since there were some air pockets entirely devoid of media altogether.  I filled in the holes, but was careful to still keep the bark mix fairly loose.  This small change should help in retaining additional moisture as well.

Monday, July 29, 2013

Marilyn's Recovery

Recently, due to some issues with our local weather conditions (very hot with temperatures rising into the 90's for weeks on end and high humidity), my orchids were not faring so well.  Air circulation was becoming a real problem and some opportunistic nasties started to attack my plants.  I ended up treating my plants with a fungicide described in my recent blog entry entitled Desperate Measures.  Although I followed the manufacturer's instructions, the problem was that the fungicidal solution must have been too strong and ended up burning their roots.

My only Phal did not survive the treatment, and Marilyn, one of my Paphs, also suffered some less damaging root burn.  This caused all of her leaves to simply droop, and her roots to dry out to the point where they felt like crunchy twigs.  The roots were so fragile I was afraid to crack them open just by handling them.  I had to find a way to rehydrate the roots and hope that they were still able to provide much needed moisture to the plant. 

I began watering the plant daily, but made sure the roots dried out rather quickly as to prevent any rot.  I have been doing this for a couple of weeks now and slowly Marilyn is perking up.  Her roots have also regained some elasticity and are not so dry that they will crack with the lightest touch.  They are now back to their normal light brown coloration and the little hairs regained their initial flexibility.  The roots now feel smooth and leathery to the touch as they should.  Slowly, the root system has been rehydrated.

And lastly, I repotted her into a smaller nursery pot with a layer of styrofoam peanuts at the bottom to increase drainage.  I also punched several holes into her new plastic pot for additional air circulation.   Of course, and I can't say this enough, the new mini tower fan has helped tremendously.  I know it will take time, but it's nice to see she is recovering.


Marilyn at her best!


Marilyn after heat stroke and root burn.  The leaves are completely wilted.


Marilyn looking much better!

Saturday, July 27, 2013

Liquid Kelp

Lately, my curiosity about liquid kelp enhancers has been increasing the more I see it mentioned on orchid forums.  The claims are that not only does it feed the plants naturally, but also aids the plant in becoming more resistant to conditions that may be less than ideal, such as higher thresholds of humidity and/or temperature.  I had seen it at my favorite gardening store, Jamali's.  So, when I went to purchase Snow White earlier this week, I picked up a bottle of Neptune's Harvest Organic Seaweed Plant Food:


This morning, I prepared a gallon of the diluted solution and generously watered each plant.  The thing with this type of potion is that once it is mixed, it should be used the same day.  It is not meant to be stored like other chemically based solutions.  I first generously watered each plant, and then I let that initial water drain out.   Then, I used the liquid kelp solution and generously poured it into the media and let it pour out the bottom of each pot.

When I was finished, I replaced the plants back in their original location.  Marilyn seemed to have really enjoyed her watering.  After about an hour or so, she perked up quite a bit.  I would definitely say that this initial treatment was definitely a success.  I will have to wait and see to gauge the success rate on the other claims the product is used for.

Wednesday, July 24, 2013

The Newcomer to the Group

After losing Petaluma, I wanted to grab another orchid before the season was over.  I must admit at this point, the pickins were slim.  I went over to my favorite orchid shop and consulted my new friend there.  I asked him about the selection and was looking for a spotted white Phalaenopsis.  I was envisioning lovely magenta spots on a white background like this one:


But, as luck would have it, the 2 plants they had that looked anything like this were rather expensive and the leaves were in horrendous shape; the roots weren't very impressive either.  I didn't want to pay top dollar for an orchid that was already at risk for further problems down the line.  I tried to bargain with my friend, but since his supervisor was there, he was not as free to negotiate like before.  Instead, I opted to continue looking.

I then decided to simply purchase a white Phalaenopsis without the spots.  It is a more subtle type of beauty, but they are undoubtedly lovely nonetheless.  Without the spotting, the price also decreased, and I managed to get a 3 spike white Phalaenopsis with a well established aerial root.  The rest of the roots were a bit dessicated at the very top of the pot, but once I really thought about it, I realized it wasn't a bad thing.  Dry is definitely way better than soggy and rotting.  So I ended up choosing a new orchid to bring home.  I named her Snow White for obvious reasons:


Before repotting, the moss Snow White came in was packed really tightly and she had so many roots that I had to cut the plastic sleeve pot all the way down the middle to free her from it.   It also took quite a while as I patiently removed all the moss trapped within the well established and very crowded root system.  I did uncover some roots which were in the beginning stages of rot and although the roots at the very top were entirely hollow and shriveled, as you got deeper into the media, there were still spots where the moss was soggy.  Initially, as I squeezed the pot, trickles of water began leaking out.  This was not good!

Once all the roots were trimmed and that took a good long time as well.  It was difficult to discern which roots would recover and which ones were beyond saving.  I am still learning and I didn't want to cut too aggressively, but I also didn't want to leave anything behind that would invite opportunistic pathogens.  In the end, there were still a fair  number of roots left, and I made sure to also add that thick layer of styrofoam at the bottom to allow for really good drainage.  I also packed the bark mix rather lightly so a good amount of air would be able to circulate between the roots and cure any other roots which may have been on the brink of decline.


The flowers are really pretty although a bit small for such a tall plant.  I am not entirely certain if flower size is solely influenced by genetics or if culture determines the growth potential, or maybe, it's some delicate balance between the two.  I will definitely have to research this a bit more.  Only time will tell for this particular orchid, but for now, there are about 10 blooms which will open in a few weeks.


Right now, I just want to concentrate on keeping this Phalaenopsis healthy, and finally master the whole watering ritual now that I have my trusty fan to help keep my little growing area not only cool, but nice and aerated.

Tuesday, July 23, 2013

Petaluma is No Longer with Us!

Unfortunately, after I treated Petaluma and Marilyn with the Physan 20, Petaluma didn't quite bounce back.  Her roots became entirely dessicated and all kinds of ugly things started happening from leaves blistering with water to the leaf tips splitting down the middle and lastly, the white patches underneath the leaves.  I knew there was no saving her and I also knew at that point, she would most likely contaminate one of the other orchids so sadly, I had to get rid of her.

At first, I was tempted to try and save her, but once I saw the liquid coming out from the leaves, I knew that this was not a good sign.  At that point, I didn't want to make the problem worse by keeping a sick orchid that could potentially and quickly wipe out my small collection.

I will miss you, Petaluma!


Monday, July 22, 2013

Vino is Being Bitten!

Lately, I have been spotting small holes on Vino's leaves.  The little holes do not ooze or are mushy.  There are not too many of them, but they all tend to be around the tip of the leaves and there were only about 3 leaves in total that had these small punctures.  After researching every type of pest I could find, I realized Vino did not exhibit any of the other tell-tale signs usually associated with parasites.  I also examined the potting mix carefully and there were no little creatures hiding in the media and no foul smell.  By the process of elimination, I came to the conclusion that one of my cats must be the culprit.  Since I have several, I was not sure which one was guilty.  By past history, I have narrowed it down to 2 suspects, but am still not 100% certain which one has been nibbling on the plant.

We have been training the cats to basically not go near the orchids for a few weeks now.  During the daytime, this is the case.  We have not had to use the squirter for about 3 weeks.  They learn fast to keep away when the squirter is used.  I just had to use it once or twice and the message was clear to them; stay away!

At night, the cats sleep outside of our bedrooms.  This is when the chewing on the leaves has been taking place.  It seems it is not a nightly thing or else there would be a substantially larger amount of holes on the foliage, but personally, I would like to see those occurrences drop down to 0.  I decided to try bitter apple spray.  I took a cotton ball and soaked it in the bitter apple solution.  I wiped the cotton ball all along the top and bottom of each leaf; similar to when I am cleaning the foliage with just water.  I then allowed the leaves to dry.  The bitter apple has a taste repugnant to dogs and cats and deters them from chewing on things by creating an unpleasant association with biting on whatever surface it is applied.  The one application I did this morning will lose potency in a couple of days so I will have to repeat this about 1-2 times a week for about a month to ensure that whichever feline is doing this gets the message loud and clear.

________________________________________________________

Update (07/26/13)

I never did manage to catch one of the cat's in the act, but ever since the small fan has been on the job, there has been no additional damage to the leaves.  I figure that the culprit does not like the gust of wind in his/her face.  For now, that seems to have solved the bitten leaves problem...yay!

Friday, July 19, 2013

Desperate Measures

I found out that the issues I had been having lately with Petaluma and Marilyn's droopy foliage and rotting roots were not so much as a result from watering problem, but an air circulation problem.  However, I do have to carefully monitor my generous watering habits.  With the torturous heat waves we've been having in the Northeast, the extremely high humidity, and some very stagnant air to boot; it was the perfect culture for roots to rot.  In desperation, I had ordered some Physan 20 fungicide and mixed up a gallon at 1 Tbs strength.  I took great care to disinfect all the tools I used, the media, and also soaked the plants for some time before and after trimming the roots.  I must say that the roots were in much better shape than last time, but there were some soft and mushy roots I had missed.  It was harder to tell with Marilyn since her roots are brown naturally, but I did manage to carefully get rid of all the dead tissue. 

Another thing I did for Marilyn was to purchase a smaller pot for her.  The 5 inch Aircone pot was simply way too big and it didn't matter how much styrofoam I used, it wasn't working out.  I got a 4" ceramic pot with nice large holes.  However, since the root mass is now substantially smaller, I repotted her in a plastic 3.5" nursery pot and made some holes in the pot before placing it inside of the decorative pot.  I also placed a layer of styrofoam peanuts at the bottom of the pot for better drainage.

For Petaluma, I placed a good 2" styrofoam layer at the bottom of the carousel pot, and made sure I avoided packing the media too tightly.  I left it nice and airy inside and made sure the roots were in between the bark mix and the styrofoam to avoid any further issues with the center of the media remaining wet while the top layer is totally dry.

I then placed each plant, after the treatment and repotting, in front of the living room tower fan.  I also made sure the media for each orchid was soaked in the Physan 20 for a good half hour or so, but at a more diluted mixed solution.  But, because the only tower fan I had is a full size one, I could not place it close to the orchids permanently without it always being in someone's path.  I decided to purchase a small tower fan.  I scoured the Internet and found a few I could choose from at my local Target...so off I went!

 After comparing a few models and even checking out the selection at the big chain electronic's store downstairs, I opted for the Holmes Mini Tower Fan with Built in Fresh Air Ionizer.  Although it was a bit more expensive than what I was looking to spend, this particular fan had a few things going for it.  The first thing was that it was compact, quiet, and aesthetically pleasing.  After all, it was going to be placed on an end table in the living room.  I wanted an oscillating fan with various speeds and preferably a timer.  The last feature I considered was that I wanted a fan with some type of protective narrowly slitted grill.  I don't want the cats to injure a paw while attempting to play with an exposed rotating blade.  This little fan has it all and a 3 year warranty.  It is absolutely perfect for what I need it to do.

So now, it is home and here is a picture of my now much happier orchids enjoying their new fan:


Thursday, July 18, 2013

Window Privacy Film

Last year, in an attempt to entertain my cats, I installed a privacy film on our main living room window and a bird feeder.   It is a 6 foot wide window facing West.  The strongest surge of sunlight comes in during the afternoon and gradually fades until the evening.  The film basically works as a 2 way mirror during the day, which is how the privacy element is fulfilled.

At first, I contemplated having this job executed by professionals.  Everyone I had spoken to had such negative comments regarding window tints wrinkling, bubbling, or warping in some fashion that I was a bit scared.  I opted for the Gila brand, which we bought at our local Home Depot.  They have a great tutorial on their site and a section with tips for success; the stuff can be peeled off and reapplied until it fully sets about a week later so you have a large margin of error in case you screw it up.

Trust me, if my daughter and I can apply this film successfully, anyone can.  We are NOT the handiest women around.  Out of all the options I explored, the Gila film was the best option because of price point, availability, reduction in heat from sunlight, and the fact that the cats could watch the bird feeder all day long without the birds suspecting a thing even when the cats were at a very close distance, and finally, since we rent, we needed something that could be removed without ruining the glass underneath.

For the first time in years, after we applied the film, we were able to leave the vertical blinds completely open without anyone being able to see in.  The film also acts as an insulator during both of the colder and hottest seasons, which provides a cost savings in our energy bill. Recently, I have discovered yet another great benefit; the lighting filtered by the film is perfect for my orchids.  I can leave my Phal and my Paph right by the window atop their shared humidity tray all day long, and they receive just enough light to serve their needs while I enjoy the brightness the sunlight provides.  It is a win-win for all involved!

Sunday, July 14, 2013

Ack! Almost Killed Petaluma

I had been noticing that her roots were looking a little funky; off-colored and some black spots.  Also, a few of the new buds had blasted.  Today, I decided to pour out the media and take a good look to see if anything was going on.  I almost fell over when I saw the condition of her roots and it was all my fault.  When I first brought Petaluma  home, her roots were nothing short of gorgeous.  So, whatever has happened since then has been entirely up to me.

I am glad I decided to take a proactive approach and take a close look inside her pot.  I had to trim off about half of her roots to remove all the bad roots and rot.  After I finished trimming off the stuff that needed to go, I put her back in the pot, but made sure the media was nice and loose so that air would be able to circulate better between the roots.  The clumps of media which I found were oversaturated, I threw directly in the garbage.

I then placed her in front of the tower fan for the rest of the day so that media could dry out some more.  Since I did not realize what was going on before I actually emptied the pot, I watered it this morning, which I now realize was the worse thing I could possibly do.

I hope I caught the problem in time and from now on, I will start waiting until those roots are a silvery color or white before I add even a drop of water to the media.  This is something I must confess I was ignoring before and was simply judging whether she needed water or not by sticking my finger inside the media.  Obviously, that is not a method that works for me.  I might start trying the toothpick method (where you insert a wooden toothpick into the media and it should come out completely clean and not be cool to the touch at all).  From my readings I know that has worked for  a lot of people.

Odd thing is the plant looks so healthy atop the soil.  The leaves are a beautiful green and firm, the flowers are blooming.  If you look through the side of pot, you could see some of the roots and they were green and plump.  If it had not been for the couple of new buds blasting, I never would've noticed there was a problem until the plant probably died.  I am just hoping that Petaluma bounces back and starts to grow new healthy roots.

I am just very disappointed.  I was trying so hard to care for her and I ended up almost loving her to the death!

Friday, July 12, 2013

Vino's New Bloom

Finally, the new bloom is opening up:


It still has a couple of days to go, but it is a very pretty flower.  Now, I have two of them:


Vino in all his glory:


Wednesday, July 10, 2013

Had to Repot Marilyn

Yesterday morning, I went to water Marilyn and as the water hit the media and shuffled it around, her roots began to show a lot.  This continued as the water to flushed through the media and got to the point where it was very clear that the old pot was becoming a bit too snug for her.  The plant was quite unsteady now sort of bobbing up and out of the planter.  I will admit that I was hesitant to move her to the new 5 inch aircone pot, but since this is all I had, and she obviously needed more space, I went for it:

Marilyn in the smaller round pot

I couldn't see how in the world she would be able to remain in her old pot.  I decided to fill the bottom of the new pot with a large amount of styrofoam.  I figured by next year, I can begin decreasing that if need be, but the filler did decrease the substrate area quite a bit.

2"-3" of chunky styrofoam at the bottom of the pot

After I repotted her, I gave her a generous watering with very diluted fertilizer so the new media would soak up some of the nutrients for later use.

This morning, I went to check on her and she looks perkier.  I think the small pot was drying out too quickly as well so moisture in the media was becoming a problem.  I lightly misted the plants this morning and headed out the door.  It has been so very hot lately.  I know it's a bit against the Paph grain, but I honestly think she appreciated being repotted in a nice roomy pot.

This looks like one happy Paph

Tuesday, July 9, 2013

Marilyn Needs Support

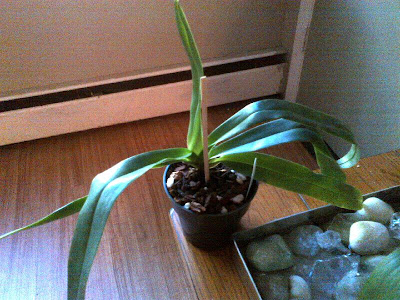
After I repotted Marilyn.  Her roots were actually touching the sides of the pot, but not because there were way too many roots, but because it's just a Paph thing!  I took great care to reposition her in such a way that her roots would be close enough to skim the walls of the pot again.  I did not want to disturb her too much.  Once I finished repotting, she was sort of hanging to one side:


I was concerned that as she stretched out in the pot and made it her own again, that she would simply continue to grow lopsided if she wasn't positioned correctly when sunning.  I decided to give her a little help and added a bamboo skewer as a support:


The bamboo stick did the job nicely, but I still decided to place her facing away from the sun so the plant would be encouraged to stand upright a bit.  Tomorrow morning, I will give her a good watering.  After the initial repotting, the Orchiata tends to dry fast at first, and since it's been so hot lately, it does not help matters any.

Monday, July 8, 2013

Sunday Morning Inspection

On Sunday mornings, I usually have a little more time to smell the flowers...Ok, I admit it; that pun was entirely intentional :)

Anyhoo, I noticed that Vino's new bud is coming along nicely and that the older flower is still holding up.  I may have 2 flowers at the same time.  It is quite exciting to have a sequentially blooming Paph since usually they only produce one flower at a time on a specific spike.

The bud is finally opening
I am thinking within the next 2 weeks or so, I should have another beautiful flower on display.

The older flower is still fresh and bouncy
I have been gradually moving his support clips to accommodate for the budding flower.  Every few days, I have been gently removing the clip and adjusting it so that the continual growth remains uninterrupted.  I am just happy that Vino is doing so well and that the culture is ideal for additional blooming.

Sunday, July 7, 2013

My Birthday Present

I decided to order my new Paphiopedilum Oberhausen's Diamant from Carter and  Holmes.  I gave a great deal of consideration to the reviews I found online about them and Kalapana Tropicals, but that was not my only factor weighed.  They were pretty much on equal footing as far as customer satisfaction and word or mouth from the gurus on the orchid board.

I then evaluated shipping costs, which actually were not as different as I had thought originally.   Neither one of these 2 factors swayed me strongly to one nursery over another.

I finally took into consideration the culture they were grown in and realized the climate in South Carolina, where Carter and Holmes is located is more akin to our climate here in New York State.  But what really sealed the deal for me is that Carter and Holmes pollinates their plants under laboratory conditions to avoid any contamination.  Although I am not looking to show my plants, I was attracted to a business that prides themselves in the quality and purity of their stock.  So once I took everything into consideration, for me, the clear cut winner was Carter and Holmes.

I went ahead and placed my order before we left on vacation, and once we arrived back home, the carefully packed and obviously labeled package was waiting for us.  I named my new orchid, Marilyn since one day she will be quite the stunner, not today, but one day.

TODAY


ONE DAY (Next Year Sometime)


So, yours truly will be patiently waiting until that day :)

Saturday, July 6, 2013

Going on Vacation

Summertime makes watering my orchids on schedule that much more important.  This schedule is not always conducive to going away on vacation without leaving someone to care for the plants.  I usually leave someone to feed the cats 2x/day, but since orchids are so sensitive to water lodging in the wrong crevices, I don't feel as secure having someone else with no orchid experience water them for me.  Since I knew we were leaving very early on a Monday morning for vacation, I opted to water the plants lightly the Saturday morning before our departure.  I would give them a heavier watering that morning before we left, and of course, when we returned back home, the next Saturday morning.

I also top-dressed Vino with Sphagnum Moss and cleaned and filled the humidity tray, and hoped for the best as we made our way out the door.  It has been hot, but lucky for me, also very humid.  I left the windows open in the apartment to ensure they had enough air circulation.  My experience indicated that Petaluma being a Phalaenopsis would fare well, but Vino being a Paphiopedilum might be stressed a bit if the pot dried out a bit too much for too long.

The vacation week was humid and hot.  Surprisingly,  Vino fared better than the Petaluma.   Vino's media was dry, but the plant itself was in good shape and the immature bloom developing in the background looks ready to open in a few more weeks.  It is free from it's leafy sheath and ready to start opening.  The Sphagnum Moss was completely dry by the time we got back.  I am not sure if it helped or not, but it certainly did not hurt anything.

Petaluma, on the other hand, had 3 immature blooms and she blasted them due to the lack of water.  She is definitely a thirsty plant.  Other than that, she was in fine shape.  When I got up this morning, I changed out the water in the humidity tray and soaked Petaluma for a good 10 minutes or so.  This perked her leaves right up.  They had been a bit droopy, but not dessicated in appearance just yet.

I then watered Vino as well.   I also dampened a paper towel, moistened it, and cleaned off each leaf and moistened them.  I find this keeps those ugly water marks at bay.  His media was dry, and even though his pot is much smaller than Petaluma's, the fresh Orchiata mix in the green plastic nursery pot held the moisture much better than the wood bark mix in the very aerated carousel pot.  Then, again, a couple of lost flowers is much better than rotted roots any day!