So I found myself an orchid board and joined to ask all the stupid questions and learn as much as I possibly could before Audrey began to wilt and die. Yes, I was totally having flashbacks of the past. They taught me that new orchids are generally purchased in small clear pots packed tightly into Sphagnum moss. For some the Sphagnum moss is a blessing because it is amazing at retaining water for a long time, for others, it is a curse. It all depends on how heavy you are with the watering can, and in what environment you will grow the plant; whether it's dry, humid, cold, hot, etc. The one thing they stressed was not to try to repot as long as the plant was blooming because I would expedite what is coined as bud blast.
I was schooled in different types of medium to plant in, different types of pots, fertilizers, etc. It all seemed a bit overwhelming, at first, but then I figured some of it out. As with any other board, there were members who agreed on one philosphy, for example repotting while in bloom, and there were others, who completely disagreed.
At first, I did remove Audrey from her original pot entirely to examine the roots. They were in almost perfect condition; no root rot whatsoever, but where the sphagnum was packed the tightest, the root had begun to turn brown so it was a good thing that I decided to loosen some of the moss to circulate more air in between the roots. I learned that in the wild, Phalaenopsis (Phal) orchids grow on trees and get their water from rain or the moisture in the air. They live in humid climates, but in captivity, it is more convenient for us to keep them in pots so the medium in the pot needs to be mostly humid, but allow for good air circulation so that the roots are never kept soggy resulting in root rot. I also learned that orchids do not like big pots and that larger pots also more rot friendly since more medium needs to be added to fill them and then the moisture is trapped in the middle for a longer span of time.
I searched high and low for a good pot for Audrey. I swore up and down that I would not repot until she finished blooming, and at the time, I really meant it. I wanted a net pot, which is the best for air circulation, but I could not find any locally. Since they are very cheap, they sell them in bulk online, and I did not need 50-100 pots. I only have 1 orchid so what is a girl to do?
I went to my local Home Depot. I must admit that the store near me doesn't have the greatest selection so pickin's were fairly slim. I did find a glazed pot that had lots of holes for good air circulation, but was 5 1/2" in diameter. I was in need of a pot approximately 2 3/4" in diameter. That would leave me a lot of extra space to promote the dreaded root rot. I purchased a glazed pot, which is also a board no-no, but since it had lots of holes, I figured it would be fine. The issue with the glaze is that it removes the breathability of the terra cotta. I found a good potting mix and fertilizer. So now I had all the materials I needed, and a plant in need of a new pot, and I tried to resist temptation, but as is often the case, I caved and went ahead and repotted her.
Since I did not find my 'dream pot', I decided to take a more creative approach to my dilemma. I read somewhere that you could use real styrofoam packing peanuts to take up space in a pot that was too large, and I lined the pot with coir fibers from one of those hanging baskets they sell. I simply purchased the coir liner and cut into it to decrease the circumference of the pot. I also discovered that these things are sold with plastic wedged in the middle between the fibers and on the underside so I had to do away with that. I discovered coir fiber is wonderful for aeration and dries up quickly so it was perfect for my intended purpose.
When you do need to trim the roots, when any are brown, black and mushy, you will need to sterilize your cutting instrument to avoid infecting the plant with any fungus or virus, which may be lurking around waiting for the right time to attack your pretty plant. You can do this by dipping the shears or blade in Isopropyl alcohol until the cutting blade has been well saturated. After you are finished trimming the dead roots, you should sprinkle any incisions with cinnamon powder, which acts as a disinfectant and anti-fungicide or you can also use a commercial solution.
I was schooled in different types of medium to plant in, different types of pots, fertilizers, etc. It all seemed a bit overwhelming, at first, but then I figured some of it out. As with any other board, there were members who agreed on one philosphy, for example repotting while in bloom, and there were others, who completely disagreed.
At first, I did remove Audrey from her original pot entirely to examine the roots. They were in almost perfect condition; no root rot whatsoever, but where the sphagnum was packed the tightest, the root had begun to turn brown so it was a good thing that I decided to loosen some of the moss to circulate more air in between the roots. I learned that in the wild, Phalaenopsis (Phal) orchids grow on trees and get their water from rain or the moisture in the air. They live in humid climates, but in captivity, it is more convenient for us to keep them in pots so the medium in the pot needs to be mostly humid, but allow for good air circulation so that the roots are never kept soggy resulting in root rot. I also learned that orchids do not like big pots and that larger pots also more rot friendly since more medium needs to be added to fill them and then the moisture is trapped in the middle for a longer span of time.
I searched high and low for a good pot for Audrey. I swore up and down that I would not repot until she finished blooming, and at the time, I really meant it. I wanted a net pot, which is the best for air circulation, but I could not find any locally. Since they are very cheap, they sell them in bulk online, and I did not need 50-100 pots. I only have 1 orchid so what is a girl to do?
I went to my local Home Depot. I must admit that the store near me doesn't have the greatest selection so pickin's were fairly slim. I did find a glazed pot that had lots of holes for good air circulation, but was 5 1/2" in diameter. I was in need of a pot approximately 2 3/4" in diameter. That would leave me a lot of extra space to promote the dreaded root rot. I purchased a glazed pot, which is also a board no-no, but since it had lots of holes, I figured it would be fine. The issue with the glaze is that it removes the breathability of the terra cotta. I found a good potting mix and fertilizer. So now I had all the materials I needed, and a plant in need of a new pot, and I tried to resist temptation, but as is often the case, I caved and went ahead and repotted her.
Since I did not find my 'dream pot', I decided to take a more creative approach to my dilemma. I read somewhere that you could use real styrofoam packing peanuts to take up space in a pot that was too large, and I lined the pot with coir fibers from one of those hanging baskets they sell. I simply purchased the coir liner and cut into it to decrease the circumference of the pot. I also discovered that these things are sold with plastic wedged in the middle between the fibers and on the underside so I had to do away with that. I discovered coir fiber is wonderful for aeration and dries up quickly so it was perfect for my intended purpose.
 |
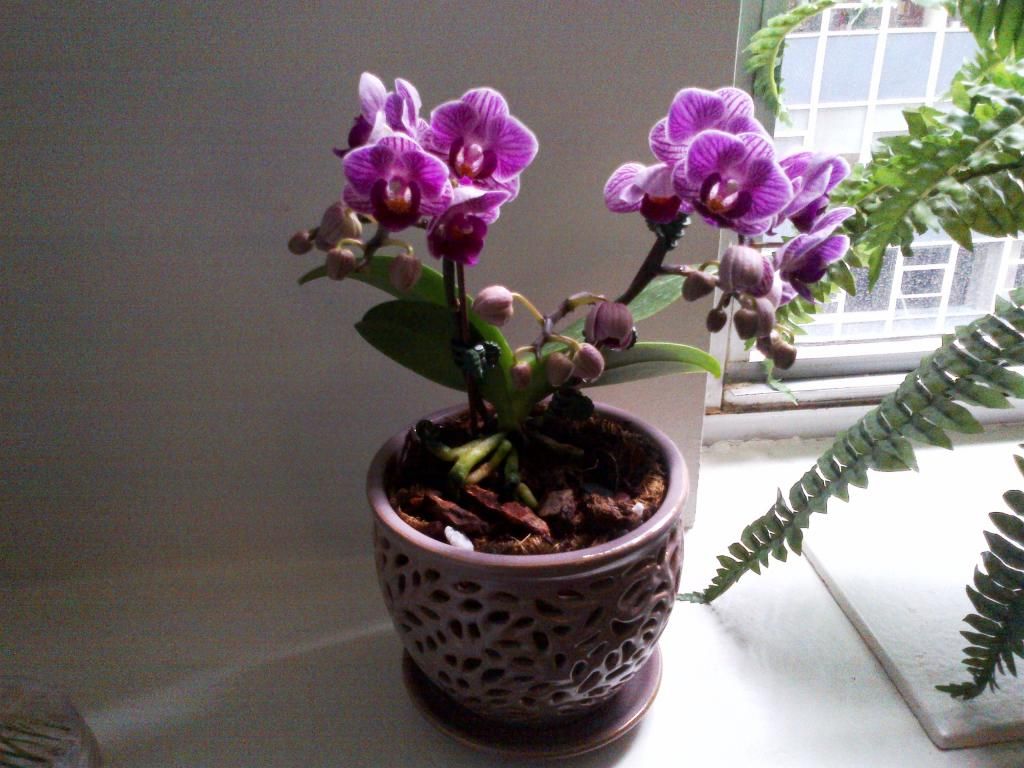
| You can see the coir fiber lining the pot and the bark mix on the inside of it |
 |
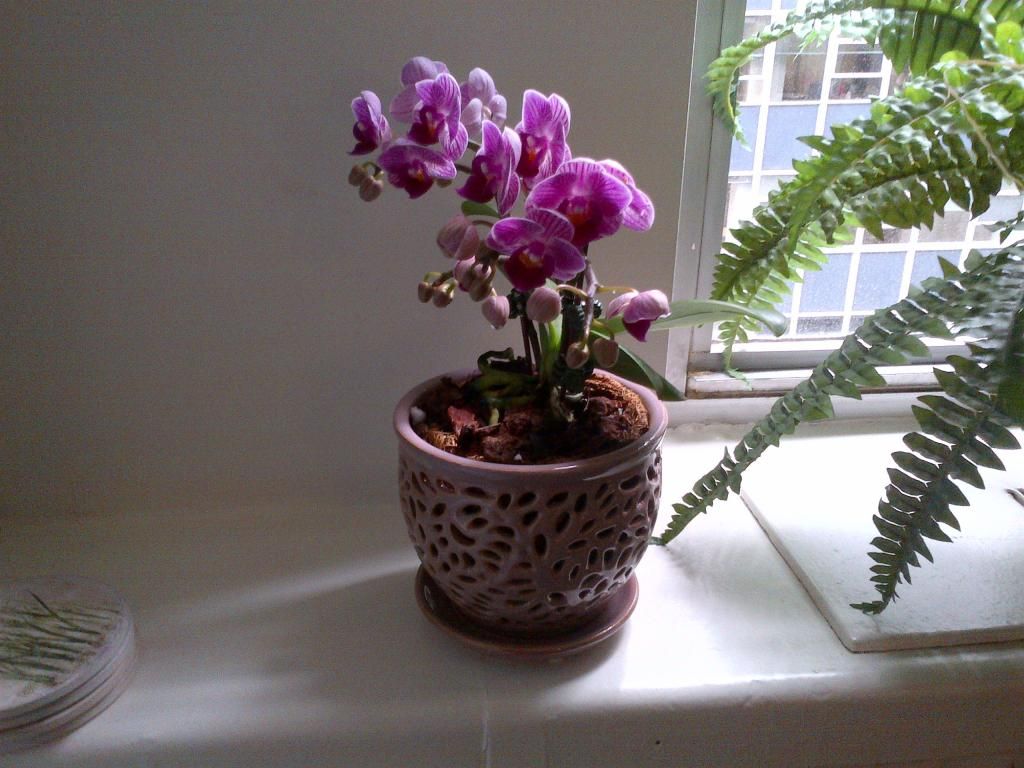
| If you look really carefully, you can see the coir fiber liner through the holes in the pot |
I chose a bark mix specifically made for Phal orchids. I first placed about 2 inches of packing peanuts in the bottom part of the pot to take up all the excess depth, then lined the pot with the coir fiber, and placed Audrey in the center. I then gently packed in the bark orchid mix around and under her. I made sure to leave some of the roots out on top of the medium to allow those roots to photosynthesize and breathe. I did this on a Friday and that Monday when I returned to the office, I expected to see all of the expelled buds strewn across the window sill, but no, seems she really likes her pot with this setup.
Here is Audrey after her first repotting a week after I took her in:
I managed to sneak her into an office with a South window so she can get at least 4-5 hours of sunlight per day during the week, and I can leave her on the sill all day during the weekends. In the Winter, I may need to purchase a grow light for her. Luckily, the person that occupies the office, I took it upon myself to timeshare the window with, travels a lot so it won't be an issue for a good long while.
Here is a good instructional video showing step by step how to repot a healthy orchid:
When you do need to trim the roots, when any are brown, black and mushy, you will need to sterilize your cutting instrument to avoid infecting the plant with any fungus or virus, which may be lurking around waiting for the right time to attack your pretty plant. You can do this by dipping the shears or blade in Isopropyl alcohol until the cutting blade has been well saturated. After you are finished trimming the dead roots, you should sprinkle any incisions with cinnamon powder, which acts as a disinfectant and anti-fungicide or you can also use a commercial solution.
No comments:
Post a Comment